
The Brain Song reactivates this hidden power using soundwave technology. Just listen 7 minutes a day and feel the difference.
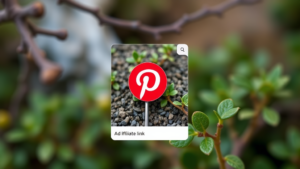
Pinterest is a powerful platform for driving traffic to your website, especially if you’re using affiliate links to monetize your content. Learning how to add a pin to Pinterest with an affiliate link can enhance your marketing strategy and potentially increase your earnings. Follow these steps for effective pinning.
Step 1: Create an Eye-Catching Image
The Brain Song reactivates this hidden power using soundwave technology. Just listen 7 minutes a day and feel the difference.
Your pin image needs to be visually appealing and relevant to your affiliate product. Use tools like Canva or Photoshop to design images that capture attention. Vertical images work best on Pinterest.
Step 2: Go to Pinterest
Log into your Pinterest account. If you don’t have one, setting up an account is straightforward and free. Make sure to optimize your profile, including a clear bio and profile picture.
The Brain Song reactivates this hidden power using soundwave technology. Just listen 7 minutes a day and feel the difference.
Step 3: Click on the “+” Icon
In the upper right corner, click the “+” icon to create a new pin. Choose “Create Pin” from the dropdown menu. This action opens a new window where you can start to add your content.
Step 4: Upload Your Image
The Brain Song reactivates this hidden power using soundwave technology. Just listen 7 minutes a day and feel the difference.
Drag and drop or upload the image you created. Ensure the image aligns with Pinterest’s image dimensions for best visibility.
Step 5: Add Your Affiliate Link
In the designated area for the destination link, paste your affiliate link. Ensure it’s a direct link to the product you are promoting. Using a link shortener can make the URL look neater.
The Brain Song reactivates this hidden power using soundwave technology. Just listen 7 minutes a day and feel the difference.
Step 6: Fill in the Description
Write an engaging description incorporating keywords relevant to your product. This will help increase discoverability when users search for related content.
Step 7: Choose a Relevant Board
The Brain Song reactivates this hidden power using soundwave technology. Just listen 7 minutes a day and feel the difference.
Select a board where this pin fits best. This not only organizes your pins but also helps users find content relevant to their interests.
Step 8: Publish Your Pin
Once everything is in place, hit the “Publish” button. Your pin is now live and ready to drive traffic through your affiliate link.
The Brain Song reactivates this hidden power using soundwave technology. Just listen 7 minutes a day and feel the difference.
By following these steps, you can effectively add a pin to Pinterest with an affiliate link, allowing you to monetize your content while providing value to your audience.